Friday, 7 August 2020

Sweet Peas demo in Oils


I have been playing around with editing and have put together a short time lapse video. 
I have to say I feel rather pleased with myself. It is a steep learning curve for someone who has no idea when it comes to technology but I think I'm getting there.

See what you think, all comments welcome.

Here is the final painting to see the video on You Tube, Click HERE


Friday, 12 June 2020

Preparing Boards

I get through quite a few boards and canvases. Not all the paintings, I have to say, make it to being framed. Quite often I will sand a painting down (if it's not been scraped off) and paint over it.

My main preference for a surface is a linen canvas. This comes in different grades. The one I am using at the moment is a fairly fine linen, which I bought on a roll of 10 metres from Ken Bromely. You can buy stretchers for your canvas but as I work outside a lot I prefer the portability of boards.

I buy a whole sheet of 3-5mm MDF (8' x 4') which my local woodyard cut into 8, 24" squares.

The next step is to seal the boards front AND back. This is especially important as MDF is porous and will absorb moisture. If, in the future, your painting were to be hanging on a damp wall or in a damp atmosphere, then, water absorbed through the back could potentially ruin your masterpiece.


Paint is applied with a roller for an even coverage


Cut the canvas to size

While the boards are drying I cut the canvas cut to size. It does shrink so I allow approx 1cm extra all round. 

A good quality PVA is poured on the board. You could use the roller again but cleaning up is a sticky business so I spread the glue with a piece of stiff card

Spreading glue with card


PVA poured on board


I ensure that there is a good even coverage of glue before carefully laying the canvas on top. 
A quick note here - the canvas comes ready primed, I have known people to used the unprimed side thinking that the linen colour was the side to use.

Use a clean piece of card

Starting from the middle of the board, use a clean piece of card as a squeegee and work towards the edges. Wipe off any surplus glue that squeezes out. When I am happy that there are no lumps of excess glue under the canvas, I repeat the whole procedure with all the other boards. I lay them face down on top of each other with some weight on top. When they are dry, trim any surplus canvas from the edges with a craft knife on a cutting mat canvas side down.

Trim surplus canvas


Now they are completely dry I can decide on the sizes I want to work on. 
I do like to work my still life paintings in a square format so I might cut one board into nine 8" x 8" squares. Another into sixteen 6" x 6" squares and another into four 12" squares.  Alternatively you can mix the sizes. For example two 10" squares and two 14" x 12". This does mean a bit of wastage but it is minimal.

Mark out canvas side up


Mark out the sizes you require using a 'T' square,  canvas side up. It is important to use a sharp knife and cut down through the canvas side. If you were to cut through the back of the board you wouldn't get such a clean cut.

Use a fresh blade in craft knife

I use a metal ruler with a safety edge cut down through the board. It does take several strokes to get through. I usually get husband Frank to do it for me if he's around.

Now we have a neat stack of boards all ready to paint on. If I am going to use them for taking out to work plein air, I glue matchsticks onto the back so that I can stack wet paintings together. I wish I could claim this as my idea but it was a tip from Ken Howard. I keep a clean board for 'the lid' and use masking tape to keep the pictures together

Matchsticks glued on


Ready to go out painting

Doing a whole sheet at a time is time consuming but well worth the effort, not just because of the stash of boards you have to paint on but, just think of all the money you've saved and the convenience.
If you would rather not go to the trouble of gluing canvas on then you can always cover the boards with gesso. Do use a good quality one though and give the boards at least two coats and don't forget to seal the back of the board. You can use household emulsion, PVA or gesso to do this.

Another tip - try and work to standard sizes, it is much easier if you have standard size frames. This way you can swap you work around.

Good luck and do let me know how you get on

Thursday, 14 May 2020

Garden Transformation

We had a bit of a storm!

We have been living at Mulberry House for over 35 years now and have made a lot of changes to the garden. There weren't a lot of trees when we moved in but these conifers were here and are/were over 100 years old.
Over the years we have lost two and then when the storm hit, another went down. We were lucky the it didn't do any damage to the building behind or to the wall. You can see that it wasn't very deep rooted. We made the decision to have the other three conifers taken down as they too were in danger of falling. You can see the prop we put in after the previous storm as the tree leaned quite a bit
afterwards

6th February

The storm strikes


 18th March

They have to go
First one comes down
You can see from the stump how far from the wall first to come down was. We have never been able to grow any thing in that area as it's always so dry. This was then a good opportunity to redesign this area of the garden. To be honest, it couldn't of come at a better time as we are in lockdown and there were no excuses not to get on with it

21st March

Bit of clearing up to do
Clearing the site took longer than we had thought possible.
We were lucky in our timing that we were able to visit a local nursery before total lockdown. We ordered some trees to go along the wall to break it up plus two ornamental trees to give a bit of height to the new area.

We had a delivery date so - no slacking!!

25th March

Clear - now what?
Once the area was clear , we were surprised at the extra space we had gained. We hadn't moved any plants or shrubs, it was just a dead area. Looking at it we decided to sweep the lawn in a bit more to reduce the width. We were at this point, in the picture above, waiting to get some turf.

29th March

Trees go in 
The trees arrived. Five 'Pyrus callryana Chanticleer' in 60ltr bags approx 16 feet tall. They took some getting in. We couldn't enlist any help because of isolating but we managed. 
The dogs, I have to say, were not a lot of help!. The ground was very dry so the stakes took a bit of hammering in, that I left entity to Frank although I did helpfully hold it still while he bashed it.

30th March

Trees planted 
Nathan had taken up some slabs from his old house and stored them at work. Having asked Jo if she needed them first, we brought them back to build a patio to re-site an existing arbour. While I painted the arbour with some paint I'd bought for another job,  Frank laid the patio. We had enough slabs to make a path weaving through the border to the seat.


Planted up path to seating area
Gedney Bulb Company produce a wonderful range of perennials, some of which we sell in our spring season at Gee Tee, I phoned Phil up and he delivered almost 100 plants to our warehouse. A lot of the order were alpine and low growing paints to soften the edges of path and patio.

8th April

Arbour in place
Once the arbour was in place the planting began. we started to move some more established shrubs and also some larger shrubs that we had in pots. Having got those in place it was time to fill in the gaps with Lupins, Delphiniums, Scabious and Rudbeckia  (from Phil) as well as the dahlias and seedlings I'd had growing in the greenhouse. I'm just keeping my fingers crossed we don't get a frost.

Frank came up with the idea of putting trellis on the wall. Great - that meant I could grow clematis and other climbers. Not sure whose idea it was but it seemed a good one at the time - we painted them black. It looks stunning but not a job I would recommend
12th May

Black trellis


14th May

Filling up

 14th May


Looking Better
There are still a few plants to go in and we are at this point we are waitting for the peony and lupins to flower. The Dahlias are pushing their way through the soiled making good progress too.


13th May

View from the arbour


Windmill & Mulberry tree from the seat
It is a joy now to sit and enjoy the view of our garden from a different angle. Of course - it wouldn't be the same without a well earned glass of chilled white wine, after all I think we deserve it - Cheers


Wednesday, 6 May 2020

Finishing the Flower challenge

Well, I made it to the end of the challenge to paint 20 flower pictures in 30 days. The thing about this challenge was, unlike other daily challenges, you could take a day or two off. This I did do and kind of lost track of where I was.
in my last post, I'd got up to painting 14 so, here is

15 of 20

Double & Fringed Tulips

I found this double tulip incredibly hard to paint, it probably looks more like a Camellia. It was a good exercise in mixing pinks, Michael Harding's 'Brilliant Pink' came into it's own here. The fringed tulips look a bit dull but I didn't want to overplay them. In hindsight, I should probably just have painted the double.

16 of 20

Lily flowering Viridiflora

MMM!  probably the less said about this the better.!  Roos Schuring uses Gouache for a lot of her flower paintings and they look amazing. so, I invested in a few tubes.. First, I tried to use them like oils, then I tried adding water but used too much. They dried quicker than I expected them to as well. The frustrating thing for me was that the lights dried darker and the darks dried lighter. Definitely need more practice at this.
 I was encouraged to read in Roos' blog that she did not dare post her first efforts - (maybe this shouldn't be here?)

17 of 20

Narcissus in gouache 2


Narcissus in gouache 1 


Not one to be defeated by a tube of bl***y paint, I thought i'd give it another try. Same subject, different backgrounds. Slightly more pleased , particularly with the one on the right - third try lucky?

18 of 20

Marigolds & Orange

Back to the oils - phew!!
I was very pleased with this little painting.  At least I knew what I was doing

19 of 20

Helebores

 Slightly cheating here as I'd already painted this previously. The thing is, I'd learnt so much since then that I repainted areas that I could see I could improve on. Much more pleased with it now

20 of 20

Lysianthus 

Not sure if I spelt that right but you know what I mean
Final painting. Playing with background and texture. The aim was to graduate the colour . I painted over an old painting that was on a textured board. To be honest I think I prefer a smoother surface


It's been an interesting experience for me as I don't consider myself to be a flower painter but, having said that, I do include them a lot in my still life paintings. I'm now continually eying up flowers in my garden with a view to painting them.
Although I didn't take the paid challenge (whereby you got feedback and help from Roos) I feel I've learned a lot. Certainly, looking on Instagram at the #30days20 I can see a massive improvement in everybody's work as the days have gone by. So a big thank you to Roos Schuring.
I'll be looking out for more challenges in the future to keep me on my toes


Tuesday, 28 April 2020

#30days20 A Flower Challenge

I'm still keeping up with the flower painting challenge set by Roos Schuring. I feel also that I am making progress, I certainly feel more confident when I start the painting.

No. 10 of 20

Single white daffodil  8"x 6"


Believe it or not white is one of the hardest things I find to paint, there are so many subtle colours if you look really hard. I used a pallet knife to create more interest in the background. It was painted over an old painting which has given more texture to the painting.

No. 11 of 20

White Tulips  12"x 12"

Still playing with white flowers I moved onto the tulips, I was more pleased with this. I love this little jug that I bought at a street market in France. I think now I am getting to grips with backgrounds too.

No. 12 of 20


WIP


Frank brought a load of tulips back from work, they were nearly past their best so I had to work quickly on this. I spent three hours getting the form and colour of the tulips down but now need to work on the back and foreground. I have put it to one side for now and hope to return to it with fresh eyes and enthusiasm.

No. 13 of 20

Red Parrot Tulips  12"x 12"


These beauties were fully blown and begging to be painted. Boy, did I enjoy this, I think it shows too. I completed it in just over an hour. I was concentrating more on the flower than the background, In hindsight , it could have been more considered. I still love it though

No. 14 of 20


Pheasant Eye & Bluebells  14"x10"

Another quickie, I set myself a strict time limit to avoid any fiddling. Painted over an old painting, I used dark glazes in the background to throw out the brilliance of the flower. I used large brushes for most of the picture to help keep it simple. I am particularly pleased with the glass. Old Holland Violet Grey was the perfect colour to use for the Bluebells, I used it again in the shadows of the narcissus. This was completed in less than an hour, I could have carried on but I'm pleased I didn't.

Tuesday, 21 April 2020

#30in20 Flower challenge

The best thing about this challenge is, that you don't have to paint every day, although I am trying to, I don't feel guilty when I spend a day gardening. Always a dilemma at this time of year as there is so much to do out there but at the same time, all those beautiful tulips and daffodils are calling to be painted.

5 of 20

Yellow Daffodils

Having painted this I have decided that it looks rather stiff, the foreground cloth is a bit severe too. I quite like the complimentary colour of the background. I will be revisiting this one once it has dried a bit

6 0f 20

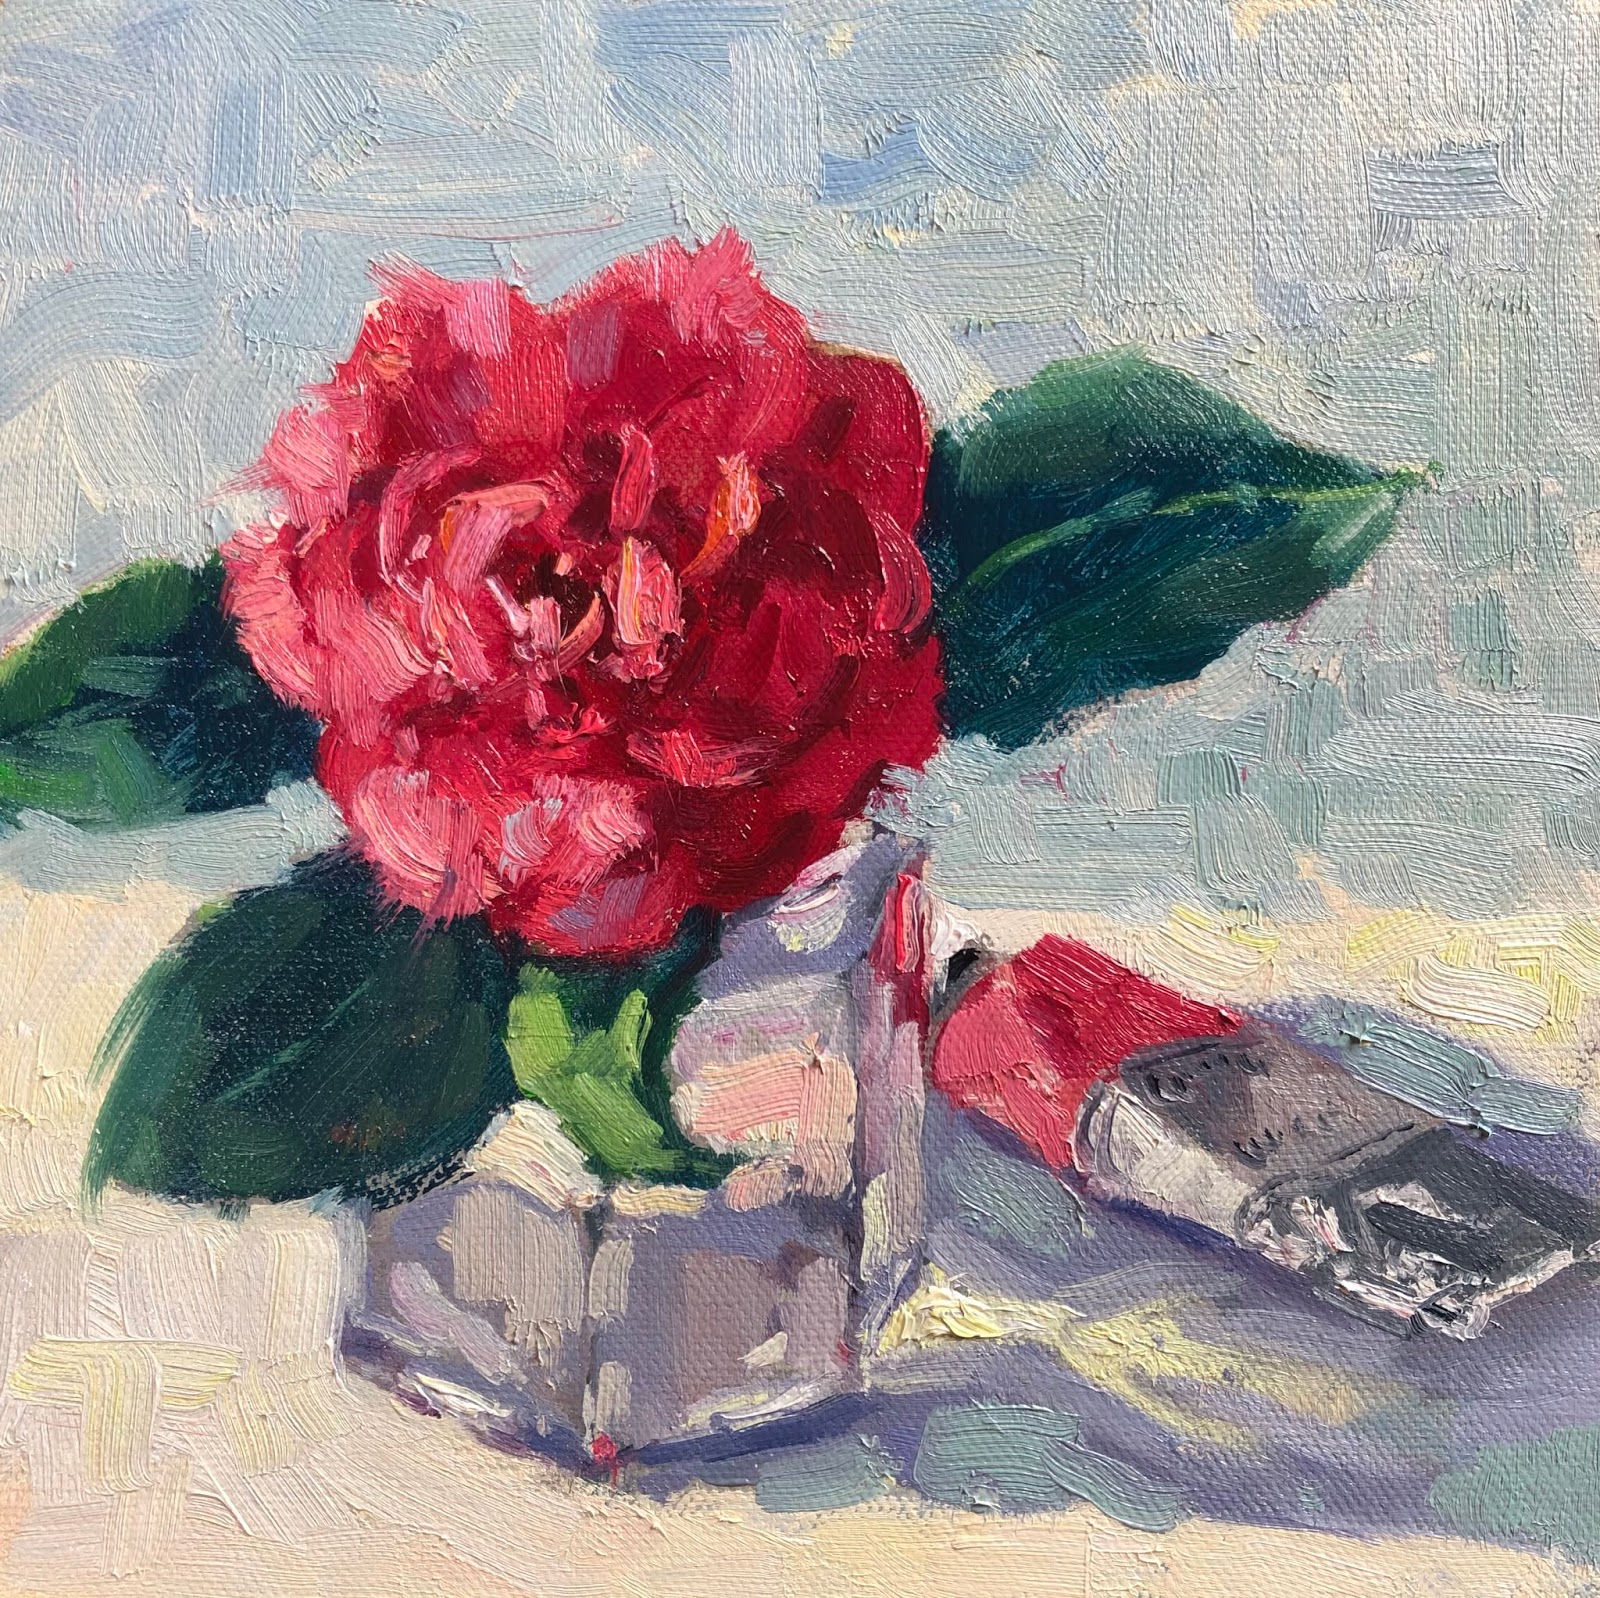
Pink Camellia

I've been tempted every year to have a crack at painting my Camillia. It puts on a fantastic show every year but I always seem to find something else to do Ha ha. (coward)
I know I have to push myself so, here it is. I wanted to add the tube of Micheal Harding 'Brilliant Pink' for added interest.

7 of 20

Pink Camellia 2

Wanted to try this one again but with different background and different highlight colours

8 of 20

Pink Camellia 3

Got it!! It needed a darker background and softer edges. I like the way the light comes through he jar. I think I'll put this one away for now and try something different tomorrow

9 of 20

Pansies & Primroses


detail

Well, I said I'd try something different!  I stood in the garden for this. Painted over two days as the sun moved too quickly. I really enjoyed this. I did struggle with getting highlights on the pansies. The addition of white just killed the brilliance of the violet. I resorted to Kings Blue Light and Old Holland violet Grey.in the end. Still some experimenting to be done there me thinks.

Although I am still not entirely pleased with anything yet, I do feel that I have learned a lot. Also looking at all the work by the other artists taking part, I can see how many of them too have learned a lot.

This flower challenge is created by Roos Schuring
You can see all the other artists' work HERE